이 글은 이 책을 참고하여 쓰여졌습니다.
오늘은 전체 조회 화면과 수정, 삭제 기능을 추가할 것이다.
{{>layout/header}}

<h1>스프링부트로 시작하는 웹 서비스 Ver.2</h1>
<div class="col-md-12">
    <div class="row">
        <div class="col-md-6">
            <a href="/posts/save" role="button"
               class="btn btn-primary">글 등록</a>
        </div>
    </div>
    <br>
    <!-- 목록 출력 영역 -->
    <table class ="table table-horizontal table-bordered">
        <thread class="thread-string">
            <tr>
                <th>게시글번호</th>
                <th>제목</th>
                <th>작성자</th>
                <th>최종수정일</th>
            </tr>
        </thread>
        <tbody id ="tbody">
        {{#posts}}
            <tr>
                <td>{{id}}</td>
                <td>{{title}}</td>
                <td>{{author}}</td>
                <td>{{modifiedDate}}</td>
            </tr>
        {{/posts}}
        </tbody>
    </table>
</div>

{{>layout/footer}}
먼저 index.mustache를 수정한다. 여기서 머스테치의 문법이 사용되었는데 {{#post}}는 for문처럼 post 라는 List를 순회할 때 쓰인다. 또한 {{변수명}} 은 List에서 뽑아낸 객체를 사용할 때 사용한다.

PostsRepository.java에도 코드를 추가해준다. Posts Entity에서 Posts를 가져온다.

PostsService에도 해당 코드를 추가한다. 테이블들을 가져와서 toList() 를 통해 Dto로 바뀌어 List에 저장되고 반환한다.
package com.david.book.springboot.web.dto;

import com.david.book.springboot.domain.posts.Posts;
import lombok.Getter;

import java.time.LocalDateTime;

@Getter
public class PostsListResponseDto {
    private Long id;
    private String title;
    private String author;
    private LocalDateTime modifiedDate;

    public PostsListResponseDto(Posts entity){
        this.id = entity.getId();
        this.title = entity.getTitle();
        this.author = entity.getAuthor();
        this.modifiedDate = entity.getModifiedDate();
    }
}
새로 생성한 PostsResponseDto.java 이다.
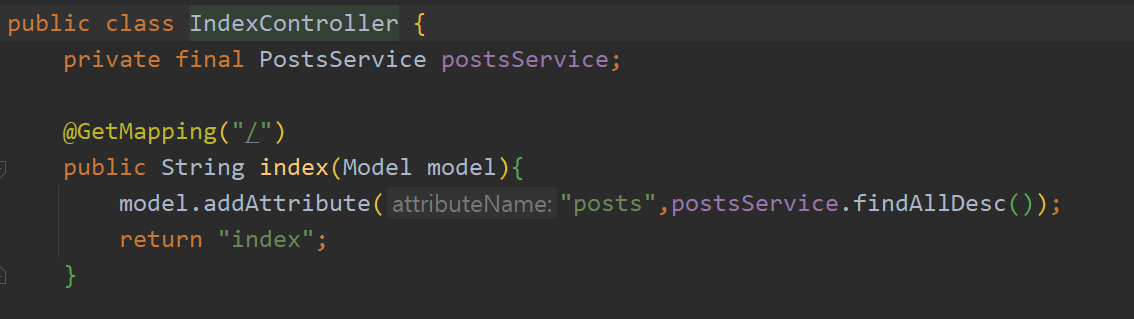
마지막으로 indexController의 글 조회를 위한 index() 함수를 정의한다. Model 객체는 서버 템플릿 엔진에서 넘어온 객체를 저장한다. 여기서는 postsService.findAllDesc()로 가져온 결과를 posts로 index.mustache 에 전달한다.
이러면 글 등록 기능은 구현이 된다.

이렇게 잘 작동한다.
그 다음으로 비슷하게 수정, 삭제 화면을 구성한다.
{{>layout/header}}

<h1>게시글 수정</h1>

<div class="col-md-12">
    <div class="col-md-4">
        <form>
            <div class="form-group">
                <label for="title">글 번호</label>
                <input type="text" class="form-control" id="id" value="{{post.id}}" readonly>
            </div>
            <div class="form-group">
                <label for="title">제목</label>
                <input type="text" class="form-control" id="title" value="{{post.title}}">
            </div>
            <div class="form-group">
                <label for="author"> 작성자 </label>
                <input type="text" class="form-control" id="author" value="{{post.author}}" readonly>
            </div>
            <div class="form-group">
                <label for="content"> 내용 </label>
                <textarea class="form-control" id="content">{{post.content}}</textarea>
            </div>
        </form>
        <a href="/" role="button" class="btn btn-secondary">취소</a>
        <button type="button" class="btn btn-primary" id="btn-update">수정 완료</button>
        <button type="button" class="btn btn-danger" id="btn-delete">삭제</button>
    </div>
</div>

{{>layout/footer}}
먼저 posts-update.mustache를 작성한다.

index.js 에도 update 함수의 기능을 작성해 준다. HTTP Method 중 수정에는 PUT 방식을 사용한다.
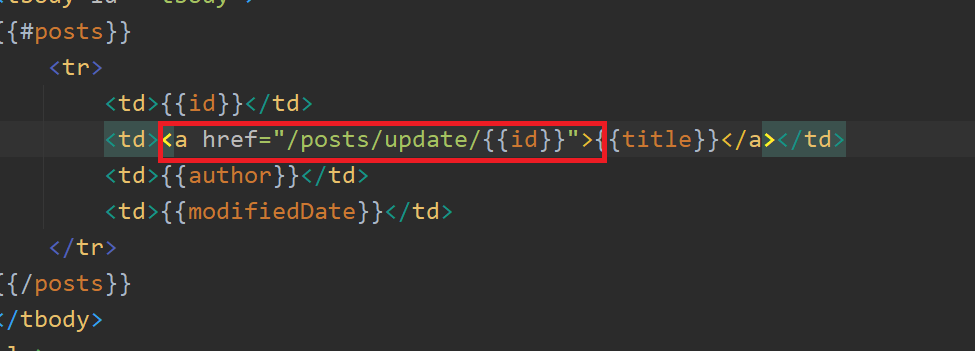
index.js를 조금 수정하여 타이틀 클릭시 수정할 수 있도록 한다.

컨트롤러에도 글 수정을 위한 메소드를 작성한다.
이렇게 작성하면 글 수정 기능도 구현 완료이다.

삭제 기능을 위해 index.js에 delete funcion을 작성

PostsService에도 삭제를 위한 delete() 작성
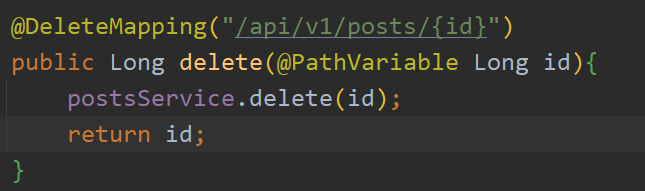
컨트롤러에도 서비스에서 만든 delete 메소드를 호출하기 위한 코드를 작성해주면 끝난다.
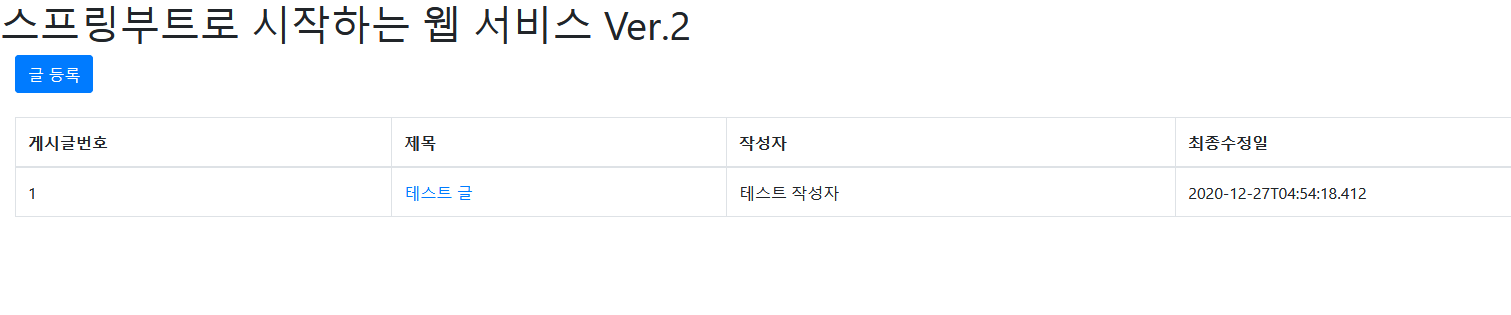
Application의 main메소드를 실행시키고 localhost로 접근한다.

이렇게 나오고, 글을 하나 작성한다.
이제 글을 제목을 클릭한다.

이렇게 게시글 수정 form이 나온다 제목을 바꾼다.

수정이 잘 되는것을 확인할 수 있다. 다시 타이틀을 클릭하여 삭제를 선택하면

성공적으로 삭제된다.
'따라 공부하기 > Spring boot 혼자 개발하는 웹 서비스' 카테고리의 다른 글
| [Spring Boot]구글 계정 연동 등록 (0) | 2020.12.29 |
|---|---|
| [Spring Boot]OAuth2 사용을 위한 구글 서비스 등록 (0) | 2020.12.28 |
| [Spring Boot]부트스트랩 이용하여 게시글 등록화면 만들기 (0) | 2020.12.26 |
| [Spring Boot]머스테치 플러그인 설치 후 기본 페이지 만들기 (0) | 2020.12.25 |
| [Spring Boot]수정,조회 API 제작과 JPA Auditing 적용하기 (0) | 2020.12.24 |


댓글